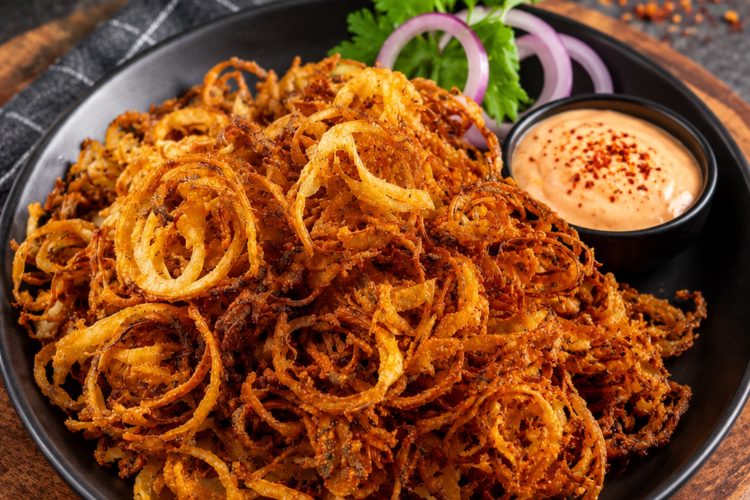
There is something special about a really good onion ring. Not the thin, tiny ones that disappear after one bite, but the thick, crispy kind with a big slice of onion inside and a crunchy coating all around it. That is exactly what I want when I make onion rings at home.
These homemade fried onion rings are simple to prepare, and you don’t need a long list of ingredients to get that crispy, golden coating. The combination of flour, egg and milk, and panko breadcrumbs gives the onions a crunchy outside while keeping the onion tender inside.
The best part is that you can make them right in your own kitchen without anything complicated. Once the onions are sliced and the coating stations are ready, the process moves along pretty quickly.
Why These Onion Rings Are Worth Making at Home
- Homemade onion rings are one of those side dishes that can make an ordinary meal feel a little more special. They are crispy, golden, and best served while they are still warm.
- I especially like using thick onion slices because you get a good balance between the crunchy coating and the soft onion inside. Thin slices can cook very quickly, but thick slices give you that substantial onion ring that many people look for.
- The panko breadcrumbs also make a difference. They create a crispier coating than you would get from flour alone, so every bite has plenty of crunch.
- And because the ingredients are straightforward, this is an easy recipe to keep in mind whenever you want something crispy to serve alongside a meal.
Choosing the Onion
- Start with one large onion. A large onion makes it easier to get nice, generous rings rather than lots of small pieces.
- Yellow onions work especially well for this recipe. They have a mild flavor that works nicely once they are fried. White onions can also be used, and they tend to hold their shape well during cooking.
- Slice the onion into about 1/2-inch-thick slices. You don’t have to make every ring perfectly identical, but try to keep the slices fairly even. This helps the onion rings cook at roughly the same rate.
- Once the onion has been sliced, gently separate it into individual rings. Be careful not to break them because the larger intact rings are what give these onion rings their classic thick-cut appearance.
An Optional Step for a Milder Onion Flavor
- If you prefer a sweeter and milder onion flavor, you can soak the onion rings in ice water before coating them.
- This step is completely optional. Some onions have a stronger flavor than others, and soaking can help take some of that sharpness away. It can also make the onion taste a little sweeter after frying.
- If you enjoy a stronger onion flavor, you can skip the soaking step and go straight to preparing the coating.
- The recipe works either way, so this is simply a matter of taste.
Set Up the Coating
- Before starting the coating process, I like to arrange everything in front of me. This makes the process much easier because the onion rings need to move from one bowl to the next.
- You will need three small bowls or shallow dishes.
- Put the flour into the first bowl.
- In the second bowl, combine the large eggs and milk. Whisk them together until the mixture is well combined.
- Then place the panko breadcrumbs in the third bowl.
- Keep the bowls close together and have a clean plate nearby for the coated onion rings.
- This three-step setup is what gives the onion rings their crispy coating. The flour helps the egg mixture cling to the onion, while the egg and milk mixture gives the breadcrumbs something to stick to. Finally, the panko creates the crunchy outer layer.
Coating the Onion Rings
- Take one onion ring and place it into the flour. Turn it around so the flour coats the surface.
- Next, move the floured onion ring into the egg and milk mixture. Make sure it is coated before moving it to the breadcrumbs.
- Finally, place the onion ring into the panko breadcrumbs. Gently turn it around and press the breadcrumbs onto the surface if needed.
- Once it is evenly covered, place the coated onion ring on a plate.
- Continue with the remaining onion rings, working through the flour, egg and milk mixture, and then the panko breadcrumbs.
- It is helpful to finish coating all of the onion rings before starting to fry. That way, once the oil reaches the right temperature, you can concentrate on cooking rather than stopping to prepare more rings.
- Try not to rush the coating process. A good, even layer of panko is what helps give these onion rings their crispy texture.
Getting the Oil Ready
- For frying, use vegetable oil. Add enough oil to a small saucepan or deep skillet to come about 2 inches up the side of the pan.
- Heat the oil over medium heat until it reaches 375°F.
- The temperature is important when frying onion rings. If the oil is not hot enough, the coating can absorb too much oil before it becomes crisp. If the oil is too hot, the outside can brown too quickly before the onion has had a chance to cook properly.
- Once the oil reaches 375°F, you are ready to start frying.
- Be careful when working with hot oil. Lower the onion rings into the oil carefully and avoid dropping them in from a height.
Frying the Onion Rings
- Work in batches rather than putting all of the onion rings into the pan at once.
- Overcrowding the pan can make it harder for the onion rings to cook evenly and can cause the oil temperature to drop. Give the rings enough room to fry properly.
- Carefully place the coated onion rings into the hot oil.
- Fry them for about 2 to 3 minutes on each side, or until the coating becomes golden brown and crispy.
- They don’t need a long cooking time. Keep an eye on them as they fry because the panko coating can turn golden fairly quickly.
- When the first side is golden, carefully turn the onion ring and cook the other side.
- The finished onion rings should have a crisp, golden coating on the outside. The onion inside should be tender while still holding its shape.
Draining the Fried Onion Rings
- Once the onion rings are finished, carefully remove them from the oil and place them on a plate lined with paper towels.
- The paper towels help absorb excess oil from the surface.
- I like to season the onion rings with salt while they are still warm. The seasoning sticks better at this point and gives the finished onion rings a little extra flavor.
- Let them sit for just a short time before serving. They are at their best while the coating is still hot and crisp.
The Best Way to Serve Them
- These onion rings make an easy side dish for all kinds of meals. They are especially good served alongside burgers, sandwiches, or other casual dinners.
- They are also great on their own with a dipping sauce.
- For dipping, ketchup and ranch are simple choices. You can also serve them with your favorite sauce if you already have one you enjoy with crispy foods.
- Because the onion rings are thick and crunchy, a creamy or tangy dipping sauce works particularly well with them.
- The most important thing is to serve them while they are warm. That’s when the panko coating has the best crunch.
How to Keep Onion Rings Crispy
- Like most fried foods, onion rings are at their crispiest when they are freshly cooked.
- If you have leftovers, place them in an airtight container and refrigerate them. They can be stored in the refrigerator for about 3 to 4 days.
- Keep in mind that the coating will soften while the onion rings are stored. This doesn’t mean they have gone bad; they simply won’t have the same crisp texture they had immediately after frying.
- One simple trick is to separate the onion rings with paper towels when storing them. The towels can help absorb some excess moisture.
How to Reheat Leftover Onion Rings
- The oven is a good way to bring some of the crispness back to refrigerated onion rings.
- Preheat the oven to 350°F.
- Place the onion rings on a parchment paper-lined baking tray, keeping them in a single layer. Bake them for about 10 to 12 minutes, or until they have reached the level of crispness you like.
- Keep an eye on them toward the end of the reheating time. The exact time can vary depending on how many onion rings you are reheating and how crisp you want them.
- The goal is to warm the onion rings through while helping the coating become crisp again.
Can the Onion Rings Be Made With White Onions?
- Yes. Both yellow and white onions can be used.
- Yellow onions are a great choice when you want a milder onion flavor. White onions can also work well and tend to hold up nicely during frying.
- If you already have one of these onions at home, there is no need to make a special trip to buy another type. The important thing is to use a large onion and cut it into thick slices.
Why Soak the Onions in Ice Water?
- Soaking the onion rings in ice water is an optional step.
- Some people prefer to do this because it can reduce the strong, sharp taste of raw onions. It may also give the onion a slightly sweeter flavor.
- If you like the natural flavor of onions, simply skip this step. There is no need to soak them before coating.
- This is one of those small adjustments you can make depending on how you like your onion rings to taste.
- Choosing the Oil
- Vegetable oil works well for this recipe because it is suitable for frying at the high temperature needed for crispy onion rings.
- The oil should be heated to 375°F before the onion rings are added.
- Using oil at the proper temperature helps the coating fry and become golden and crisp rather than sitting in oil for too long.
- Always use care when heating and handling hot oil, and avoid filling the pan too high. About 2 inches of oil is enough for frying these onion rings.
Easy Flavor Variations
- The basic recipe already gives you crispy and flavorful onion rings, but the egg and milk mixture can also be seasoned if you want to change the flavor.
- Italian seasoning can add a different savory taste.
- Garlic salt or garlic powder can give the onion rings a little extra garlic flavor.
- Cajun seasoning is another option if you want something with more spice.
- These additions are optional and are not necessary for the basic recipe. The original combination of flour, eggs, milk, and panko breadcrumbs is enough to make a delicious batch.
A Few Simple Tips for Better Onion Rings
- Cut the onion thick. About 1/2-inch slices give you the thick onion rings that make this recipe so satisfying.
- Prepare the bowls first. Having the flour, egg and milk mixture, and panko ready makes coating much easier.
- Coat evenly. Make sure each onion ring gets covered in all three stages so you get a crisp coating all around.
- Don’t overcrowd the pan. Frying in batches helps maintain the oil temperature and gives the onion rings room to cook.
- Watch the cooking time. The rings generally need only about 2 to 3 minutes per side.
- Drain after frying. A paper towel-lined plate helps remove excess oil.
- Serve them warm. Freshly fried onion rings have the best crunch.
Why These Homemade Onion Rings Are So Good
- What makes these onion rings stand out is the combination of a thick onion slice and a crispy panko coating.
- They have that classic homestyle feel without requiring a complicated preparation. Once the onion is sliced, the rest is simply a matter of coating and frying.
- The outside becomes golden and crunchy while the onion inside softens as it cooks. Served warm with a dipping sauce, they make a side dish that is hard to resist.
- If you have only tried thin frozen onion rings before, this thick-cut version is worth making. The larger onion slices give you much more onion in every bite, and the panko coating adds plenty of crunch.
- Once you get the three-bowl setup ready and the oil heated, the whole process is straightforward.
- These are the kind of onion rings that are best eaten fresh, right after frying, when the coating is golden and crisp. Make a batch for a casual dinner, serve them with your favorite dipping sauce, and you have an easy homemade side that everyone can enjoy.
- Thick-cut homemade onion rings with a golden, crispy panko coating. The onions are coated in flour, an egg and milk mixture, and breadcrumbs before being fried until crisp. Serve them warm with your favorite dipping sauce.
Duration
- Prep Time: 10 minutes
- Cook Time: 5 minutes
- Total Time: 15 minutes
- Servings: 2
- Course: Side Dish
- Cuisine: American
Ingredients
- 1 onion, sliced into 1/2-inch-thick slices and divided into rings
- 1/2 cup flour
- 2 large eggs
- 1/2 cup milk
- 1 cup panko bread crumbs
- Vegetable oil for frying
Instructions
- Slice the onion into 1/2-inch-thick slices and gently separate them into rings.
- Set up three shallow bowls. Place the flour in the first bowl, whisk the eggs and milk together in the second, and add the panko breadcrumbs to the third.
- Dip each onion ring into the flour, coating it evenly. Then dip it into the egg and milk mixture, followed by the panko breadcrumbs. Place the coated rings on a plate and continue until all the onions are coated.
- Add about 2 inches of vegetable oil to a small saucepan or deep skillet. Heat over medium heat until the oil reaches 375°F.
- Carefully place the onion rings into the hot oil in batches. Fry for about 2 to 3 minutes per side, or until golden brown and crispy. Avoid overcrowding the pan.
- Remove the cooked onion rings and place them on a paper towel-lined plate to drain excess oil.
- Season with salt while warm, if desired, and serve immediately with your favorite dipping sauce.
Notes
- Soaking the sliced onions in ice water before coating is optional. It can help reduce the strong onion flavor and make the onions taste slightly sweeter.
- Yellow or white onions can be used. Yellow onions have a milder flavor, while white onions tend to hold their shape well.
- Vegetable oil is recommended for frying.
- Store leftover onion rings in an airtight container in the refrigerator for 3–4 days. Separating them with paper towels can help absorb excess moisture.
- To reheat, place the onion rings on a parchment paper-lined baking tray and bake at 350°F for 10–12 minutes, or until crisp.
- For a different flavor, optional seasonings such as Italian seasoning, garlic salt, garlic powder, or Cajun seasoning can be added to the egg mixture.
Nutrition Information
- Calories: 354 kcal
- Carbohydrates: 54 g
- Protein: 15 g
- Fat: 8 g
- Saturated Fat: 3 g
- Trans Fat: 1 g
- Cholesterol: 170 mg
- Sodium: 311 mg
- Potassium: 314 mg
- Fiber: 3 g
- Sugar: 8 g
- Vitamin A: 338 IU
- Vitamin C: 4 mg
- Calcium: 166 mg
- Iron: 4 mg
