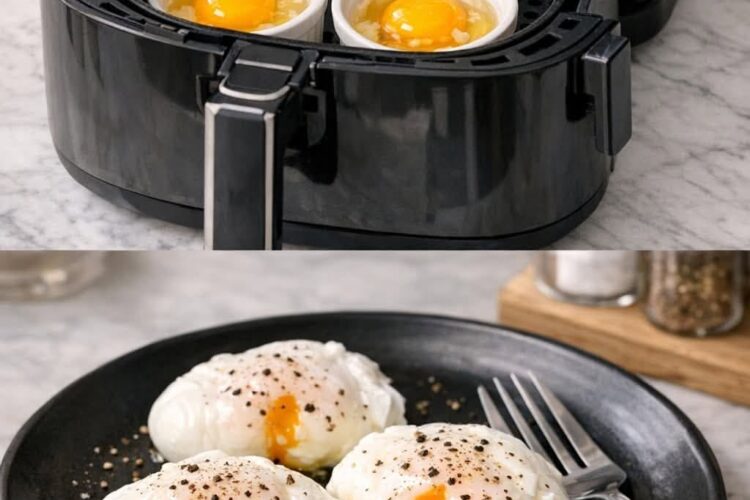
Poached eggs can seem much harder than they really are. The first few times, it is easy to end up with egg whites floating everywhere, a yolk that separates, or an egg that looks more like a thin fried egg than a neat poached egg.
At home, I find that the process becomes much easier once a few small things are handled properly. The most important one is straining the egg before it goes into the water. It takes only a few seconds, but it makes a noticeable difference because the thin, watery part of the egg white is what creates those messy wisps in the pot.
There are also two different ways to poach eggs here. The first is an easy method that works particularly well when making several eggs together. The second is the traditional whirlpool method, which is better when making a single egg and want that neat, rounded shape.
Both methods use the same basic ingredients. The difference is mainly in how the egg enters and moves through the water.
What Makes a Good Poached Egg?
- A good poached egg has whites that are completely set but still tender, with a yolk that remains soft and runny in the center. The outside should hold together instead of spreading into loose strands throughout the water.
- The freshness of the egg matters, too. Fresh eggs naturally have firmer whites, so they hold around the yolk much better. Older eggs contain more watery white, which makes them more difficult to poach neatly.
- That doesn’t mean older eggs cannot be poached. Straining them first helps remove the loose white and makes the process much more manageable.
- For everyday eggs from the refrigerator, I prefer using them cold rather than letting them come to room temperature first. Cold eggs have firmer whites and are easier to handle.
The Two Methods I Use
- There are two ways to approach this recipe.
The Easy Drop-and-Roll Method
- This is the method I would choose when making several poached eggs at once. It is also the easier option if you’re still getting comfortable with poaching.
- You can use it for up to six eggs in one batch, provided the pot is large enough to give the eggs some room. It is also the better choice for eggs that are about a week old or older.
- The egg is gently rolled into the hot water rather than dropped from above. Once the white begins to set, the egg is turned over with spoons so it develops a rounded poached shape.
The Whirlpool Method
- The whirlpool method is the classic technique. It is especially useful when making one egg and trying to get a taller, more oval-shaped poached egg.
- Instead of placing the egg directly onto the bottom of the pot, the water is stirred to create a small vortex. The egg is then slipped into the center. As the water spins, the white wraps around the yolk.
- This method needs a little more control, so I wouldn’t use it for eggs that are a week or more old. Older whites are more likely to break apart instead of wrapping neatly around the yolk.
Start With Cold Eggs
- For either method, I use eggs straight from the refrigerator.
- The reason is simple: colder egg whites have a tighter structure and tend to hold their shape better when they enter the water. If the eggs have been sitting at room temperature, the whites can be looser.
- This small step is worth doing because poached eggs are all about keeping the egg together while the white sets.
- If you have extremely fresh eggs, the process is even easier. Freshly laid eggs have naturally firm whites, so they can hold their shape beautifully. But ordinary store-bought eggs can still work very well when prepared properly.
Strain the Eggs
- Before heating the water, I prepare the eggs.
- I crack one cold egg into a small strainer placed over a bowl or glass. I let it sit for about 30 seconds and gently jiggle the strainer so the thin, watery white drains away.
- What remains is the thicker white surrounding the yolk.
- This is the part that makes the biggest difference. The watery white is responsible for many of those loose strands that float away in the water and make the finished egg look untidy.
- Once the egg has drained, I carefully transfer it into a teacup.
- I repeat the process with the remaining eggs, putting one strained egg into each teacup.
Why Teacups Work So Well
- A teacup makes the eggs much easier to handle.
- Instead of cracking an egg directly over a pot, the egg can be lowered close to the water before being released. That means there is very little distance for the egg to fall.
- The shorter the drop, the less likely the white is to spread apart.
- For the easy method, having several teacups ready before starting also makes the process smoother. For the whirlpool method, one teacup is usually enough if I’m making one egg.
Getting the Water Temperature Right
- The water temperature is another important part of successful poached eggs.
- I fill the pot with water and bring it to a boil over high heat first. Once it reaches a boil, I immediately lower the heat.
- At this point, I want to see tiny bubbles coming from the bottom of the pot, but I don’t want large bubbles breaking across the surface.
- The surface may move very slightly or quiver, but it shouldn’t be rapidly rippling.
- This matters because water that is too active can knock the egg around while the white is still setting. That can turn a neatly shaped egg into a mess.
- On the other hand, water that isn’t hot enough won’t set the outside of the egg quickly enough. The white can spread into the water before it has a chance to form around the yolk.
- So the goal is hot, calm water.
- Once the heat is lowered, I start adding the eggs fairly quickly so the water doesn’t have too much time to cool.
Easy Drop-and-Roll Method
- This is my preferred method when I need several poached eggs.
- For this method, use a pot with enough room for the eggs to sit without touching one another too much.
- Fill the pot with about 7.5 cm / 3 inches of water. Bring it to a boil, then lower the heat until only tiny bubbles are coming from the bottom.
Gently Roll the Eggs Into the Water
- Take one of the teacups and lower it into the water.
- The goal is to get the cup close to the bottom of the pot before releasing the egg. Once the cup reaches the base, tilt it gently so the egg rolls out rather than falling from a height.
- This small movement helps the egg maintain a better shape.
- Repeat with the remaining eggs. Try to get them all into the pot within about 15 seconds.
- If you’re just learning, there is no need to rush into making six eggs. Starting with one or two gives you time to get comfortable with the movement.
Turn the Eggs
- About 20 seconds after the first egg enters the water, the white should have started to set, but it won’t be completely firm.
- This is the point where I gently turn the egg over.
- A slotted spoon and a tablespoon or dessert spoon work well together. I start with the first egg that went into the pot and finish with the last one.
- The gentle turning helps the egg develop that familiar poached shape instead of spreading flat against the bottom.
- After turning them, leave the eggs to cook for another minute.
- Then turn them again if desired. A second gentle rotation can help improve the shape.
Check the Eggs
- After another 30 seconds, check one egg.
- Lift it from the water with a slotted spoon and gently press or probe the white and yolk.
- The white should be soft but set, while the yolk should still be runny.
- If you prefer a firmer yolk, you can cook it a little longer.
Drain Before Serving
- Once the eggs are cooked, lift them out with a slotted spoon and place them briefly on paper towels.
- They only need around 15 seconds for the surface to dry from the remaining heat.
- I don’t leave them sitting on the paper towel for too long because the egg can start sticking to it.
- After draining, transfer the eggs to the serving plate and serve while hot.
Why the Easy Method Works
- The easy method lookss simple, but each part has a purpose.
- Straining removes the loose white that would otherwise spread around the pot. Using cold eggs gives the white a firmer structure. Rolling the egg close to the bottom prevents it from falling apart on the way down.
- Turning the egg while the white is partly set is what helps shape it.
- The water also needs to be hot enough to set the outside quickly, but calm enough that the egg isn’t tossed around.
- Once those things are under control, poaching several eggs becomes much less intimidating.
Whirlpool Method for One Perfectly Shaped Egg
- When I’m making just one egg, the whirlpool method is a fun option.
- It takes a little more attention, but the result can be beautifully rounded and taller than an egg made with the easy method.
- I wouldn’t use this method for eggs that are a week or more old. The whites of older eggs don’t have enough structure to hold together well in the spinning water.
- Start by straining the cold egg and transferring it to a teacup, just as with the easy method.
- Fill a small pot or large saucepan with about 7.5 cm / 3 inches of water. If using vinegar, add it at this stage.
- Bring the water to a boil, then lower the heat until the water is hot but calm, with tiny bubbles rising from the bottom and no large bubbles breaking the surface.
Create the Whirlpool
- Use the handle of a flat-handled wooden spoon to stir the water quickly in a circle about 10 cm / 4 inches wide.
- The goal is to create a vortex in the center.
- A useful test is to stop stirring and see how long the visible “V” shape in the middle remains. Around seven seconds is a good indication that the water is moving at the right speed.
- If the vortex is extremely fast and continues for much longer, the egg can spin too aggressively. This can even cause the yolk to separate from the white.
Add the Egg
- Bring the teacup very close to the water surface.
- Don’t let the edge of the cup touch the water because that can interfere with the spinning motion.
- Tip the egg swiftly into the center of the vortex.
- The egg should enter gently but quickly. If you release it too slowly, one part of the egg may begin cooking while the rest continues moving, which can result in an uneven shape.
- Once the egg is in the water, leave it alone while the vortex slows.
- As the water spins, the white naturally begins wrapping around the yolk.
Cook Until Done
- Let the egg cook for about 1 1/2 to 2 minutes.
- After around 30 seconds, you can gently rotate the egg once or twice if you want to improve its shape.
- When the time is up, lift the egg with a slotted spoon and check the texture.
- The white should be soft but set, and the yolk should remain runny.
- Transfer the egg to paper towels for about 15 seconds to drain away excess water, then move it to a plate.
Which Method Should I Use?
- If I am making one egg and have a reasonably fresh egg, I use the whirlpool method.
- If I am making several eggs, or if the eggs are older, I use the easy drop-and-roll method.
- The easy method is also the one I recommend for beginners because it gives you more control over the eggs.
- The main difference between the finished eggs is their shape. The easy method tends to produce a slightly flatter egg and older eggs may have a more noticeable flat or “UFO” shape.
- The whirlpool method can produce a more upright, oval-shaped egg when the egg is fresh and the water movement is right.
Can I Poach Several Eggs at Once?
- Yes. The easy method is especially useful for this.
- For multiple eggs, use a larger pot so there is enough space for each egg. You don’t want them crowded together or sticking to one another.
- The whirlpool method can also be used for multiple eggs, but it requires more practice. Once the first egg has started setting, another egg can be added after creating another swirl.
- For a larger number of eggs, I find the easy method much less stressful.
Making Poached Eggs Ahead
- Poached eggs don’t necessarily have to be served immediately.
- If I’m preparing several eggs for a meal, the cooked eggs can be placed into cold water to stop them from cooking further.
- For a batch of six to eight eggs, cold tap water is enough. If you’re making a much larger quantity, ice water can help keep the temperature down.
- Once cooled, place the eggs in an airtight container or covered bowl and keep them submerged in the water in the refrigerator.
- They can be stored this way for up to two days.
Reheating Poached Eggs
- When it’s time to serve them, bring a large pot of water to a boil and then lower the heat.
- Take the eggs directly from the cold water and carefully place them into the hot water.
- Leave them there for about 30 seconds.
- Because the eggs start out cold, this short reheating time warms them without continuing to cook the yolks significantly.
- Remove them with a slotted spoon and drain them briefly on paper towels before serving.
A Few Things I Don’t Add
- Salt isn’t necessary in the poaching water.
- It doesn’t make a meaningful difference to the finished egg during such a short cooking time, and adding a large amount of salt isn’t useful here.
- Vinegar is different. It can be used with the whirlpool method and may help the whites stay together, but it is optional.
- The amount provided in the ingredient list is specifically for the whirlpool method.
- The biggest improvements come from using cold eggs, straining the watery whites, and getting the water temperature and movement right.
How I Serve Poached Eggs
- Poached eggs are one of those things that can turn a very simple meal into something that feels special.
- The easiest option is toast. A plain slice of toast with a hot poached egg is enough, especially when the yolk runs into the bread.
- Avocado toast is another easy combination.
- Poached eggs also work beautifully with asparagus, baked beans, or a Caesar salad.
- And, of course, they are perfect for Eggs Benedict. A toasted English muffin or another bread of choice can be topped with ham, bacon, or smoked salmon, followed by the poached egg and hollandaise sauce.
- The important thing is to serve the eggs while they’re still warm, especially when the yolk is meant to stay runny.
Final Tips for Better Poached Eggs
- If poached eggs have given you trouble before, I would focus on a few things rather than trying to change everything at once.
- Use fridge-cold eggs. They hold together better than room-temperature eggs.
- Strain every egg. This removes the loose white that causes wispy pieces in the water.
- Don’t use the whirlpool method for old eggs. If your eggs are about a week or more old, choose the easy method.
- Boil first, then lower the heat. The water needs to be hot enough to set the egg immediately.
- Keep the water calm. Tiny bubbles are fine, but large bubbles and strong movement can break the egg apart.
- Use a teacup. It gives you much more control than dropping an egg from above.
- Keep the egg close to the water. A shorter drop means less spreading.
- Don’t leave cooked eggs on paper towels for too long. About 15 seconds is enough to remove excess water without allowing them to stick.
- Once these little details become familiar, poached eggs are surprisingly straightforward. The easy method is dependable for several eggs, while the whirlpool method is a nice technique to use when making one fresh egg and aiming for a more classic shape.
Description
- Tender poached eggs with soft, set whites and runny yolks. Use the easy drop-and-roll method for several eggs or older eggs, and the whirlpool method when making one fresh egg with a more rounded shape.
- Prep: 1 minute
Cook: 2 minutes
Category: Breakfast, Eggs
Cuisine: Western
Ingredients
- 1–6 eggs, fridge cold
- 2 tbsp white vinegar or cider vinegar — optional, for the Whirlpool Method only
Instructions
1. Strain the Eggs
- Crack each fridge-cold egg into a small strainer set over a bowl or glass. Leave for 30 seconds and gently jiggle the strainer so the watery white drains away.
- Transfer each egg carefully into a separate teacup.
2. Heat the Water
- Fill a pot with about 7.5 cm / 3 inches of water. Bring the water to a boil over high heat, then lower the heat.
- The water should have tiny bubbles rising from the bottom, but large bubbles should not be breaking the surface.
3. Easy Drop-and-Roll Method
- Use this method for up to 6 eggs.
- Submerge a teacup into the water and gently roll the egg onto the base of the pot, keeping the drop as short as possible.
- Repeat with the remaining eggs, getting them into the water within about 15 seconds.
- After 20 seconds, gently turn the eggs upside down using a slotted spoon and a tablespoon or dessert spoon, starting with the first egg added.
- Leave for 1 minute, then turn the eggs again if desired.
- Cook for another 30 seconds, then lift one egg with a slotted spoon to check. The whites should be soft but set and the yolks should be runny.
- Transfer the eggs to paper towels for about 15 seconds to drain, then serve.
4. Whirlpool Method
- Use this method when making one egg, particularly with fresh eggs.
- Fill a small pot or large saucepan with about 7.5 cm / 3 inches of water. Add the vinegar if using. Bring to a boil, then lower the heat.
- Using the handle of a flat-handled wooden spoon, stir the water quickly in a circle about 10 cm / 4 inches wide. Create a vortex that remains visible for about 7 seconds after stirring stops.
- Bring the teacup close to the water without touching it. Quickly slide the egg into the middle of the vortex.
- Allow the egg to spin naturally as the water slows. After about 30 seconds, gently rotate it once or twice if desired.
- Cook for 1 1/2 to 2 minutes, then lift with a slotted spoon and check that the white is set and the yolk is runny.
- Drain on paper towels for about 15 seconds and serve.
Large-Batch Instructions
- Place cooked poached eggs into a bowl of cold water to stop them from cooking further. Use ice water when making a very large batch.
- For reheating, bring a large pot of water to a boil, then lower the heat. Transfer the eggs from the cold water into the hot water and leave for 30 seconds.
- Remove with a slotted spoon, drain briefly, and serve.
Notes
- Fridge-cold eggs hold their shape better than room-temperature eggs.
- Straining the eggs is important because it removes watery whites that create loose wisps in the water.
- Eggs that are about 1 week or older are better suited to the Easy Method.
- Use a large pot when making several eggs so they have enough room.
- Keep the poaching water hot but calm. Tiny bubbles are fine; large bubbles breaking the surface are not.
- Vinegar is optional for the Whirlpool Method.
- Salt is not needed in the poaching water.
- Poached eggs can be stored submerged in water in an airtight container in the refrigerator for up to 2 days.
- Poached eggs are not suitable for freezing.
- Serve on toast, with avocado, asparagus, baked beans, Caesar salad, or as Eggs Benedict.
Nutrition Per 1 Large Egg
- Calories: 78 kcal
- Protein: 6.3 g
- Fat: 5.3 g
- Saturated Fat: 1.6 g
- Carbohydrates: 0.6 g
- Sugar: 0.4 g
- Cholesterol: 186 mg
- Sodium: 62 mg
